
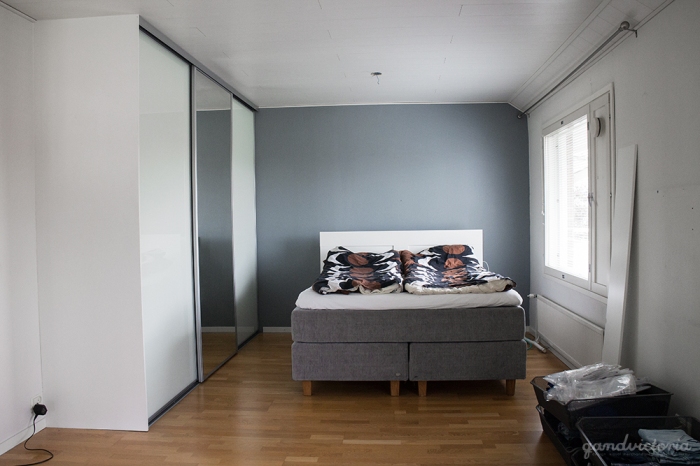
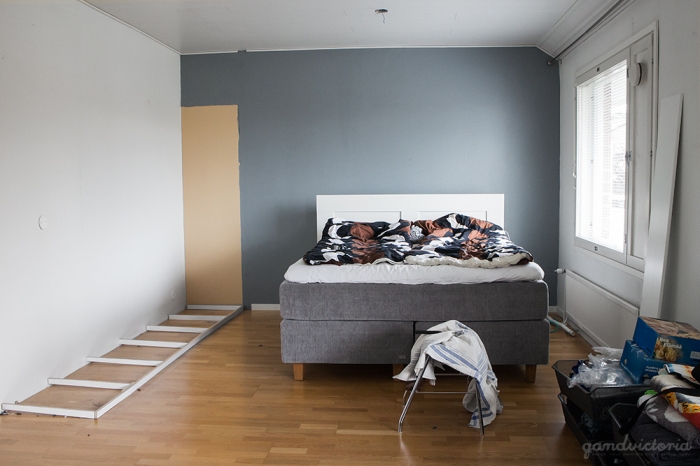
We’ve been waiting for to start the renovation of our upper floor bedroom since September. In September, we started with removing the clothing cabin, which you can see in the first pictures of this blogpost. We sold the clothing cabin and the doors on tori.fi and actually got quite much for it, so a tip is to always sell your stuff forward instead of just throwing it away! When the cabin was gone, it took almost a month before we kept on going – the laminate ceiling, which one of the previous owners had put up, had been bugging me since the very beginning. First of all, the mounting was sloppy and second of all, the laminate ceiling didn’t cover the whole area of the second floor. Above the staircase you could see a nice plaster ceiling and I was for a long time thinking if it was the same kind of ceiling that was hidden under the laminate. It took a while to convince my partner about a ceiling renovation, but all of a sudden, one day the old laminate ceiling was thorn down.
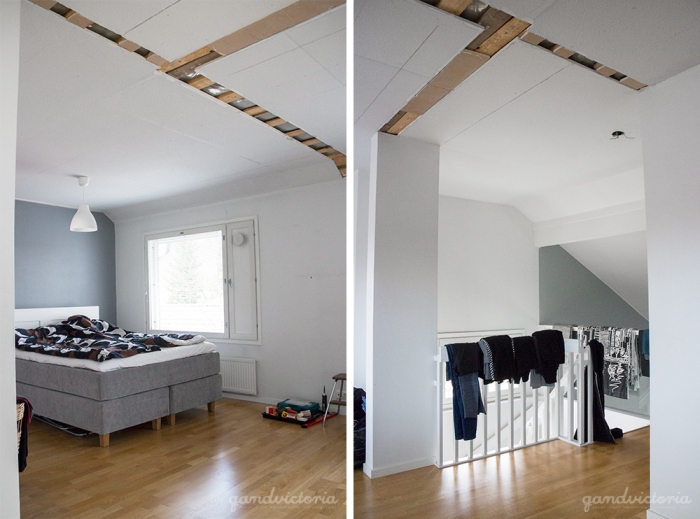
The bedroom ceiling
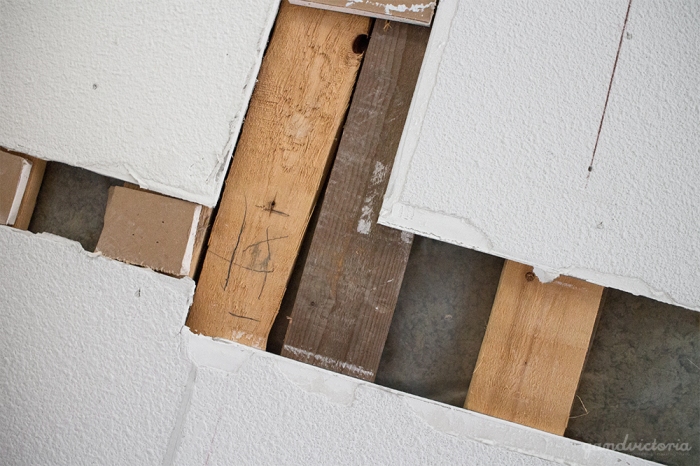
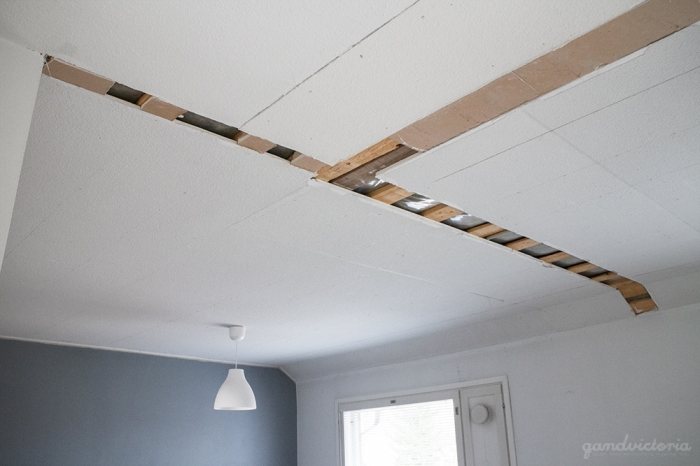
We knew that the upper floor had been divided in to two bedrooms before and we guessed that the new ceiling had been mounted in connection with the removal of the dividing walls. We got this confirmed once we removed the laminate ceiling, ’cause the holes from the old walls were still there. Neither one of us have renovated a ceiling before, so we started with sending out offer quotes to different companies in Turku. Two quotes later, which also took us two months to get, we have finally decided to do it ourselves. We had budgeted about 700 euro for this project, but when the offers were closer to 1 300 and 2 500 euro, it was quite an easy choice to make. It’s quite a time consuming and difficult job to do, but it still feels like something we would like to try to do. It might be that we’ll regret it, but you can’t know this until you try!
Läs texten på svenska
Ända sedan september har vi väntat på att få dra igång med renoveringen av sovrummet på övre våningen. Då i september började vi med att ta bort klädskåpet som ni kan se på bilderna här ovanför. Klädskåpet och dörrarna sålde vi sedan på tori.fi och fick dessutom en ganska bra summa i utbyte, så ett tips är att alltid sälja vidare istället för att slänga bort! När skåpet var borta så tog det nästan en månad innan vi fortsatte – jag hade nämligen redan från start stört mig på det vita laminattaket som någon av de förra ägarna hade satt upp. För det första var det ganska slarvigt lagt och för det andra så täckte inte laminattaket hela ytan på övre våningen. Ovanför trappan så fanns ett fint rappat tak och jag funderade länge om det var samma tak som fanns dolt under laminatplankorna. Det tog en tid att få övertalat min sambo om en eventuell uppiffning av taket, men plötsligt en dag så hade vi rivit ner det gamla laminattaket.
Sovrummets innertak
Vi visste att övre våningen tidigare hade varit indelat i två sovrum och vi gissade att det nya taket hade blivit monterat i samband med nerrivningen av mellanväggarna. Det här fick vi ju bekräftat när vi hade rivit ner laminattaket, för där under så fanns hålen från mellanväggarna kvar. Varken jag eller min sambo har tidigare renoverat ett innertak, så vi började först med att höra oss för och skicka ut offertförfrågningar till olika företag runtom i Åbo. Två offerter senare, som dessutom har tagit två månader att få, så har vi äntligen beslutat oss för att fixa det själva. Vi hade budgeterat en summa på ungefär 700 euro för det här projektet, men när offerterna började gå upp mot 1 300 och 2 500 euro så var det ett lätt val att ta. Det är ett ganska tidskrävande och svårt jobb att göra, men det känns ändå som något vi gärna prövar på. Det kan ju hända att vi ångrar oss efteråt, men det kan man ju faktiskt inte veta innan man har testat!

The plans for the renovation
To make a new similar plaster finish would in this case be to difficult, so we have decided to even out the old ceiling and make a completely new surface. I would like it to look handmade, so the surface will have some kind of texture in it. First off, we’ll sand the old plaster and then put two or three layers of Weber LR+ finishing plaster . The substance should be white, so that way we don’t need to paint the ceiling once the new finishing plaster has been put. Once the ceiling is done, we’ll paint all the walls and fiiinally mount our gigantic PAX cabin from IKEA. We’ve lived with our wardrobe on the floor the previous months, so it will feel so luxurious once the cabins are up. So, keep your fingers crossed that the ceiling project goes as planned! Also, make sure to follow me on Instagram if you want to see more from our renovation – I will be posting some pictures, but I’ll also share some stories from the renovation in real time!
Läs texten på svenska
Planerna för renoveringen
Att göra en ny rappyta skulle i det här fallet bli för invecklat, så vi har bestämt oss för att jämna ut den gamla rappningen och göra en helt ny yta. Jag vill gärna att det skall se handgjort ut, så själva ytan kommer att få något typ av mönster. Först kommer vi att slipa ner den gamla rappytan och sen lägga på ny Weber LR+ ytspackel i två eller tre lager. Den lär vara vit till färgen så på så sätt slipper vi måla taket när spacklet väl är lagt. Efter att taket är klart så kommer vi att fixa och måla alla väggar och slutligen äääntligen montera vårt gigantiska PAX-skåp från IKEA. De senaste månaderna har vi levt med garderoben på golvet så det kommer att kännas väldigt lyxigt sen när skåpet är på plats. Så, håll nu tummarna för att takprojektet går som planerat! Följ mig på Instagram ifall ni vill se mera från renoveringen – där kommer det att dyka upp en del bilder, men också en del stories från renoveringen i realtid!


